I really wanted to grow strawberries but I didn't have a place to put them. I had some driftwood in the garage that was heavy and taking up space, I really needed to do something with it or pitch it.
I had the idea of hanging strawberries from the wall. I decided to use the driftwood and attached mason jars.
Supplies: driftwood, jars, hose clamps, 4 inch screws, paint, & an impact drill.
I had to drill a hole in each hose clamp then attach them to the driftwood with regular 2 inch screws.
I painted the jars so that the sun would not shine on the roots. I was told (by my horticulturist-husband) that the roots can't be exposed to the sun. Makes sense when you think about it, roots grow under the ground. I chose white so that it wouldn't absorb a lot of heat.
I planted the plants in the jars then closed them into the hose clamps.
We used the impact drill with a masonry bit to get this on the wall. We used 4 inch screws to make sure it was going to attach well. It took some manpower and help but it is secure!
I wanted to jazz it up a bit more so I painted it. I have my first couple of strawberries on the way!
Welcome! We are The Creative Pair, a happily married couple who love to create and inspire others. We share a unique love for home improvements and we love to share our ideas and creations. Enjoy!
Sunday, April 15, 2012
Creating a bench
I decided I wanted to make a bench to place in the den. I wanted it primarily to help fill up a blank wall but also function as an additional seat.
I bought supplies at Lowes and JoAnn's. I spent about $110.
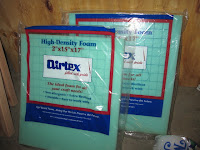
Supplies purchased: Fabric, Cushions (2), Quilting foam, Wood (1.5x3.5 & 1in. plywood), Stain, & Polyurethane (gloss finish)
Supplies I already had- steal wool pads, screws, glue
SUPPLIES
The legs were about $10 per leg
I first made my frame, I determined the size of the frame from the size of the cushions. It was cheaper to buy two pieces of small foam instead of 1 large piece. I had to measure the 1.5x3.5 and build that frame first.
I cut the plywood next and screwed it on top of the frame.
Next I stained the legs and then stained them again, and again, and again...
For the tight areas where I couldn't stain with the rag I used a small paint brush to apply the stain.
Still not dark enough!
Staining took a few days. I stained and let them dry, then used steel wool to smooth the surfaces then stained again. Once I finally got the stain color I wanted I used the polyurethane spray (gloss) for the finish. I did 2 coats of finish and used the steel wool pads in between the 1st and second coat to smooth the surface.
FINALLY!
I decided to glue the cushions onto the frame so they would not shift while I was moving the bench. I didn't have to use much glue.
All glued!
The price of the foam was about $15 per foam square. That was cheaper than having a large piece cut to the size/shape I wanted.
I covered the bench with the quilting foam. If did this over I would have used another layer of foam or a thicker piece. It is expensive, anywhere between $9 for a thin roll and $15 for a thinker roll. I bought the cheaper roll.
My favorite part, using the staple gun!! The foam was very thin and I needed to put a lot of staples in to make sure the foam would stay.
Next I added blocks to the top of the legs with some left over 1.5x3.5. I later realized I didn't like the height of the bench so I went back and cut 3.25in off the top.
(The pieces I cut off)
The hardest part was making the fabric fit and making sure the corners looked good.
I used 3 screws per leg to attached to the bench. I had to get help to hold the legs so that they didn't go askew while attaching them.
Finally, complete!
Subscribe to:
Comments (Atom)


